What’s the Easiest Way to Mix Veneer Mortar in Small Batches?
Mixing an entire bag of manufactured (veneer) stone mortar all at once is not practical for most do it yourselfers. The mortar hardening process outpaces your fledgling masonry skills. Yet when you try to fractionally measure out water and mortar in small amounts, it becomes confusing and inaccurate. What’s the easiest way to do this?
Best Answer
By texture and visual cues, mix the mortar in a small batch in a paint tray or 5 gallon bucket until it has the consistency of creamy peanut butter.
Details
When you have a 30 pound bag of mortar, like Laticrete MVIS Veneer Mortar, and you add their recommended 5.9 quarts of cold water to the entire bag, you get two things:
First, you end up with a veneer stone mortar that’s perfect for do-it-yourselfers. You can apply it directly to the back of the stones and then stick them on cement board, no need for wire mesh and a scratch coat. And this, my friends, is one of the core tenets of the cherished system of half-assed remodeling: why do it hard when you can do it easy?
Second, with the addition of the water, it’s now 42 pounds, which is a hell of a lot of mortar for one session. If you were a professional mason or even a seasoned novice working in a pair, you just might be able to put away that entire bucket in a session. But for most of us, the mortar is going to stiffen up pretty rapidly. You don’t have hours and hours of workable time with mortar. And it’s not like other wet substances like drywall compound or paint that can be cryogenically frozen simply by putting a lid on it.
How to Do It
You get to use up all of your mortar in one session–without having to dispose of any over your neighbor’s fence. Even better, it means you get a better installation because you’re not rushing your work or over-extending your session, simply because you want to use up what you’ve got.
1. Scoop Mortar
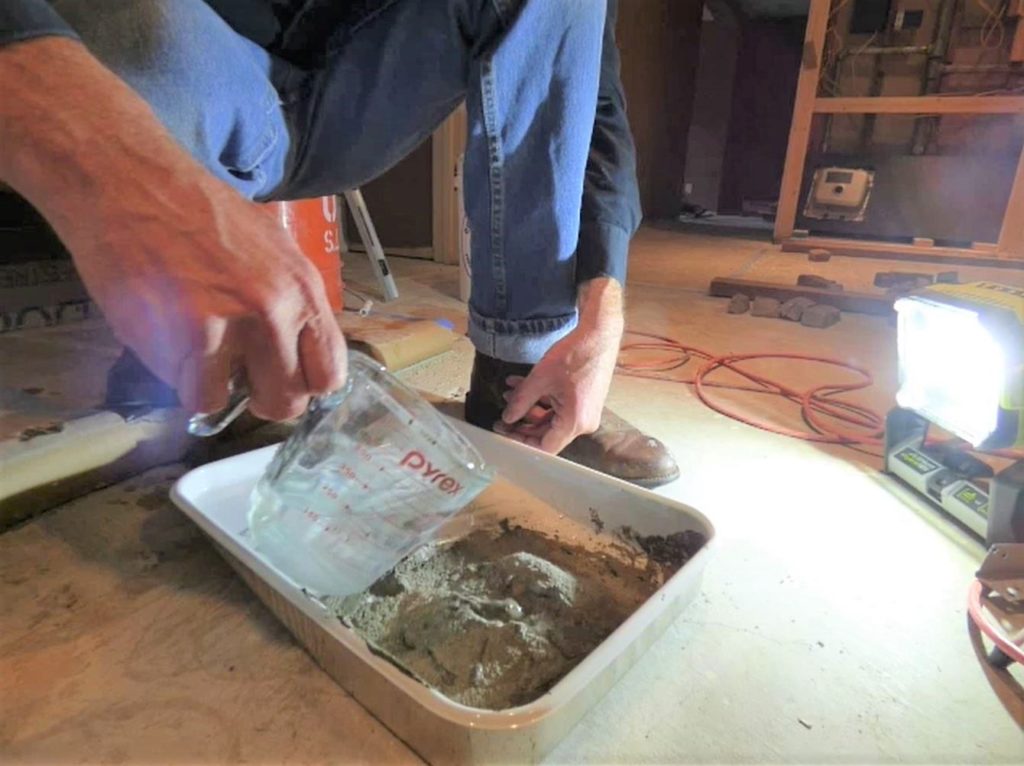
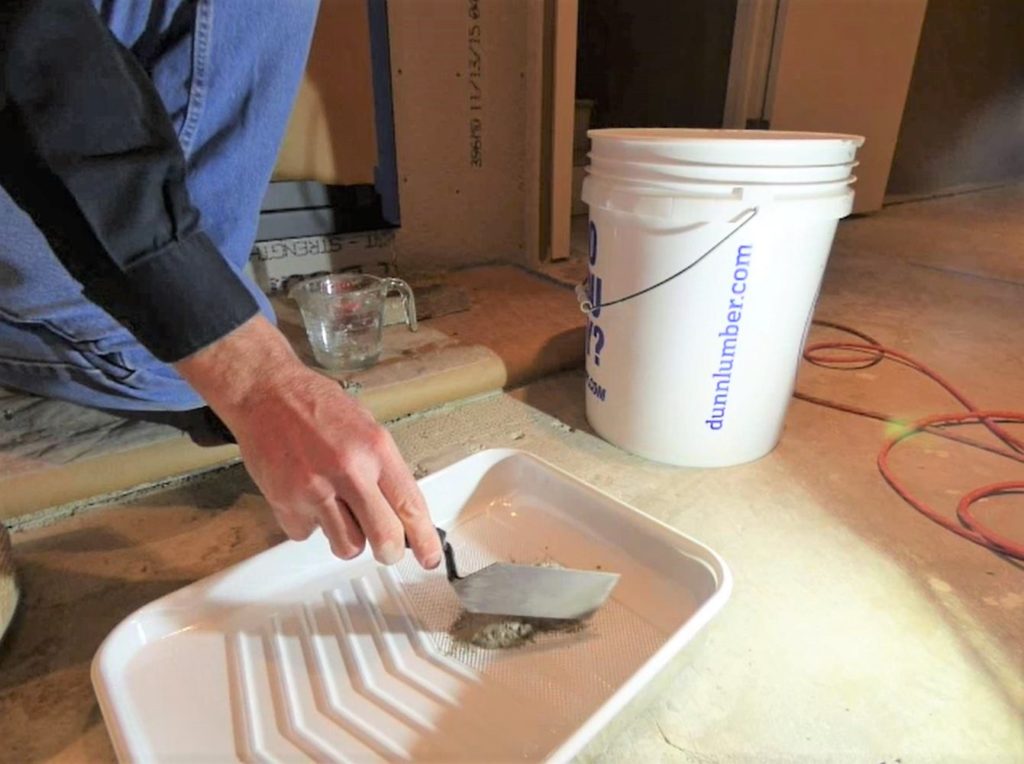 You can use a five-gallon plastic bucket, like those cheap orange buckets from Home Depot. Or if you want to dispose of the container when you’re done, you can use a one-gallon plastic milk jug, cut in half and thoroughly washed. Better yet, use a metal paint tray with a plastic liner in it. The low sides and wide, flat bottom make it easier to mix the mortar.
Scoop out about three or four trowels of dry mix. This is better than pouring directly from the bag, as pouring is a less predictable delivery system. Also, it creates a lot of dust.
2. Add Water
Fill a measuring cup like a glass Pyrex with about 2 cups of cold water. Slowly pour in small amounts of water, continually folding over and mixing the mortar. Don’t let the water get ahead of the dry mix. If so, you’ll need to add in more dry mix to balance out the mixture.
3. Mix Until Smooth But Stiff
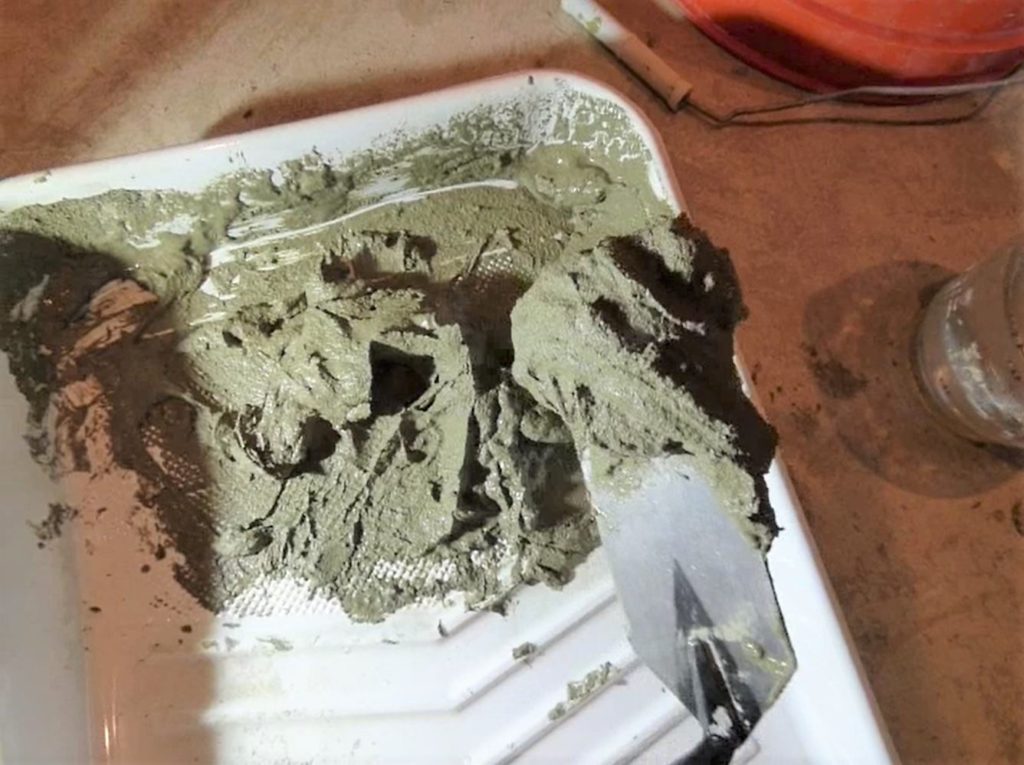 Keep mixing until the mortar becomes smooth and creamy. One metaphor you always hear about stone veneer mortar is to mix it until it has the consistency of creamy peanut butter. This is a good comparison. The mortar should still be stiff enough that it will stick on the trowel when you turn it on its side. But it should not be thick and clumpy.
Best Sources
Self
Given that I’m not especially fond of wetwork (grout, mortar, paint, etc.), yet I consistently turn out perfect small-batch veneer mortar, you can feel confident that this method will likely work for you. My “likely” hedge is there because some people have a hard time dealing with “by feel” mixing and prefer exact weights and volumes.
Mainstream Media – Home Related
I am not alone: many sources use that “creamy peanut butter” metaphor. This Old House has a good tutorial about installing a veneer stone fireplace surround where they discuss mixing mortar to that consistency rather than doing an entire bag.